hey all! thanks so much for following along on my little consultant website launch journey! today, i'm going to show you how to make this cute. "typewriter thank you card." and, after this weekend is over i'll pick a lucky customer to win the, "just my type" stamp set and the 3 copics that we'll use to make this card!
 the first thing i did is gather all my supples and pick a color pallet for my card. for this particular card i was inspired by those beautiful vintage royal typwriter colors we always see! the papers used are; slate solid, bermuda solid, vanilla solid, onyx gingham, school lined & bubblegum shimmer couture damask.
 i love that the new a muse studio stamps are that quality red rubber that we all love, but with the ease of a cling stamp! another great feature, other than the fact that they come completely put together and pre-cut is that the image is printed on the cling part of the stamp, so it's super easy to place your stamp correctly! okay, on to our cardmaking!
 step 1: cut a 1" x 1.25" rectangle of the school lined paper and use your slate ink pad to stamp "thanks so much" up towards the top and then distress the edges lightly with your tuxedo black memento ink pad. set this piece aside for later.
 step 2: let's make our typewriter! go ahead and stamp your typewriter on vanilla paper using the tuxedo black memento ink pad and then circle punch it.
step 3: it's time to color, the photos above will make it easy to see what's what color wise as you go along. first use R32 peach to color the body of the typewriter. next use W6 warm grey 6 to color the return, space bar & sides of the keys. Lastly, use BG10 cool shadow to color the "inside" of the typwriter and tops of the keys.
 step 4: now it's time to insert our little "typed" message. use your exacto knife to cut a slit along the bottom of the "paper roller". flip the typwriter over and put a small line of adhesive on the back, below the slit then flip it back over and slide your typed message in. lastly, put a small piece of foam tape behind the top of your typed message so that it looks like it's coming up out of the typwriter!
step 5: punch a scalloped circle out of slate paper and attach your typewriter circle.
 step 6: make a bar 4 (3.5"x5") card out of bermuda paper by scoring and folding a 3.5"x10" piece in half.
step 7: cut a 2.5"x4.75" rectangle of onyx gingham paper and a 1"x4.75" piece of bubblegum shimmer couture damask and lightly distress the edges of both using the tuxedo black memento ink pad.
 step 8: attach your onyx gingham straight onto your card so that it's even at the top and sides.

step 9: use foam tape or pop dots/squares to attach your scallop based typewriter onto your card so that it's to the right of your card and the bottom of your typwriter is even with the bottom of the gingham piece.
 step 10: attach foam tape to your card as pictured above so that you can attach your "tabletop" paper at the same depth as your typewriter.

step 11: attach your bubblegum shimmer couture damask "tabletop" to the card so that it lines up nicely with the bottom of the typwriter.

step 12: cut a teal heart from the a sheet of heart twinkle stickers and stick it right onto your typed message. ta da! you're all done!
wasn't that easy peasy? think of all the different color typewriters you could make! i happen to be kind of addicted to this color combination right now, so i thought i'd share 2 other a muse studio cards that i've made using it!

scooter from the "ooh la la!" stamp set & sentiment from the "sushi & wasabi" set (which is another favorite!) also, don't you love that polka dot organdy ribbon? it's another addictive product from a muse studio!
umbrella from the "bridal beauty" set (i use this for all kinds of things, especially under the weather and bad day cards!) & sentiment from the "wild rose" set.
i hope you enjoyed my little step by step how-to! and don't forget, one of the customers who places an order in
my a muse studio consultant shop this weekend will win the "just my type" stamp set and R32 peach, BG10 cool shadow & W6 warm grey no. 6 copic original markers that i used in this how-to! just place an order this weekend and then e-mail me at missmorganteaches@gmail.com to let me know that you did so that i can make sure that you are entered into the drawing!
don't forget to check back tomorrow for 4 brand new cards i've made to show you just how nicely a muse studio cards play with some of my favorite scrapbook papers!

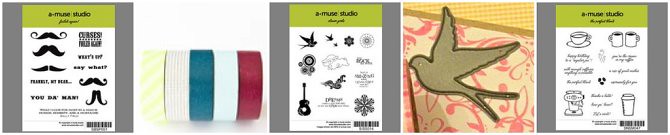
 the infamous "to go" cup! i use this guy alllllll the time for every holiday, season and general card that i can think up because it's just so fun to paper piece! and now, with the launch of a muse studio it's been re-released in cling rubber with a whole bunch of perfect sentiments, an espresso machine and a couple of mugs in a set called, "the perfect blend." i love it so much, that this set was even in my friday faves!
 i am loving these bright, cheery colors right now, along with the mix of stripes and florals, blame it on the "botanica" section at anthropolgie! this brand new, "life is a song" stamp set is quickly becoming a new favorite for me, kind of for the same reason that i love "the perfect blend" so much, it's great for all ocassions, color combinations and super easy to use! it comes with 4 different birdcages and 2 interchangable chains, 3 birds, these cute music notes and a whole slew of sayings that can be mixed and matched. there is also a really nice "with sympathy" sentiment in this set. for this card i used a line of onyx twinkle stickers to make my own chain! it's nice that they come on a line of adhesive so that you don't have to worry about lining them up straight!
  ohemgeethesepeeps! i love this little guy! and now, he comes in a fun set called, "for peep's sake" along with the sentiments "for peep's sake" and "to one of my favorite peeps" in a cute new font (i used my old stamp here), along with a spring chick, a buny with a basket and a couple of larger easter sentiments. lot's of cuteness in this one! for this card, i just stamped my peep 3 times, in 3 different ink colors, on a piece i punched and layered using my labels 4 nestabilities and then when the ink was dry i went over them with my quickie glue pen and sprinkled diamond glitter on top to give them that sugar loaded peep look!